Runecast Analyzer | ServiceNow Plugin – Quick Start Guide
ServiceNow is one of the most popular IT Service Management (ITSM) tools available. The Runecast Analyzer plugin for ServiceNow can generate and assign support tickets based on new findings for vSphere, NSX-V, vSAN & Horizon. The plugin also monitors previously generated tickets for changes and provides updates when available.
Setting up the application
Admin privileges in ServiceNow are required to deploy and configure the application. Please complete the following steps for a successful setup.
Download the application file
Download the application file at portal.runecast.com by clicking on the “ServiceNow Plugin (.XML)” as shown below.
.png)
Importing the application
To import the application:
1. Open the required ServiceNow instance and login using your administrator credentials.
2. Type “Retrieved” into the left pane’s search box and click Retrieved Update Sets on the left panel as shown below.
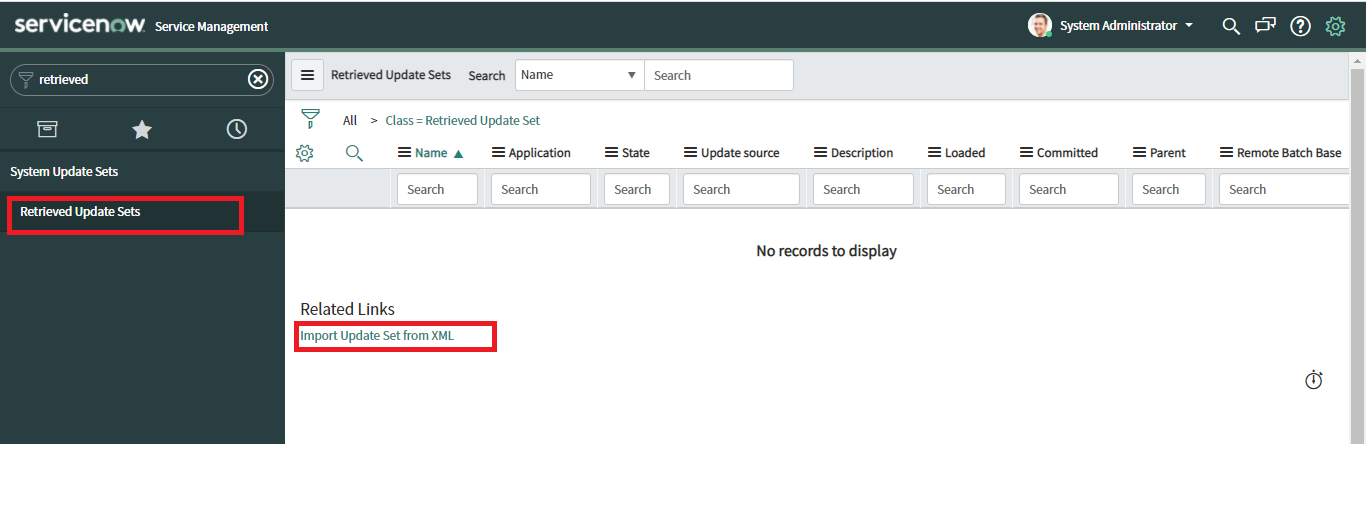
3. Click the Import Update Set from XML link.

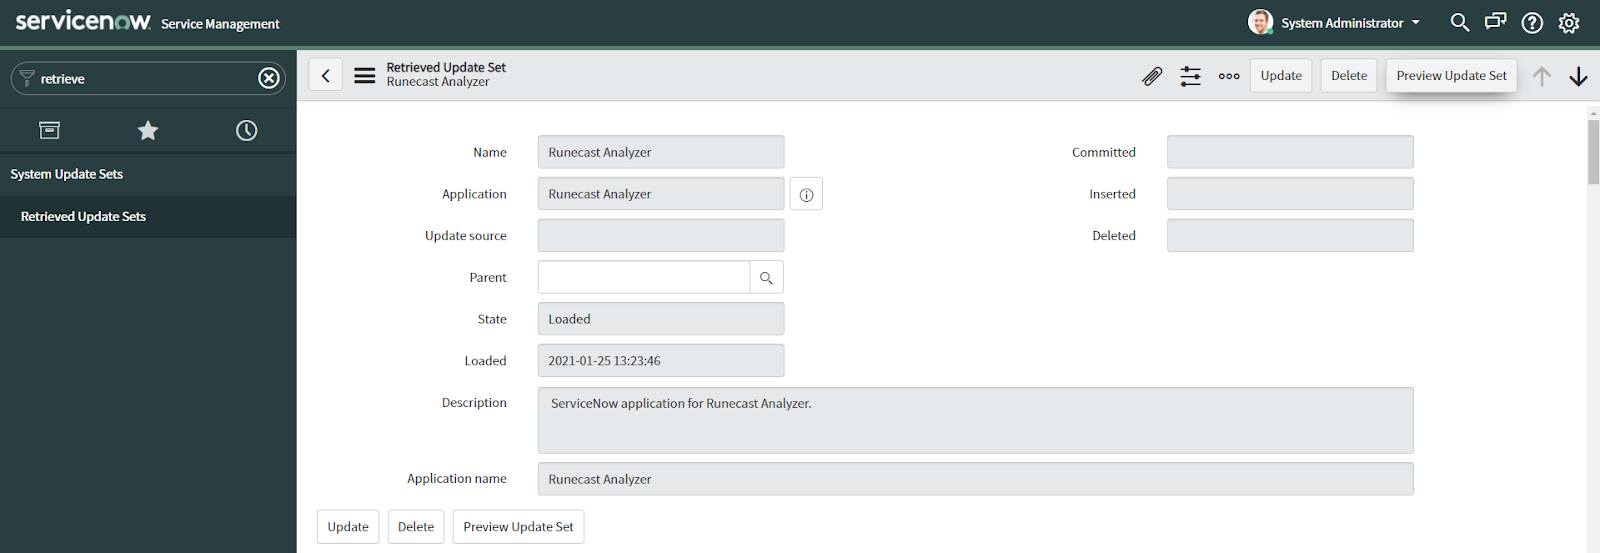
4. On the Import XML page, choose the XML file you downloaded from the Runecast portal and click Upload. The XML is loaded as follows:

5. After the XML file imports, it displays the status as “Loaded”.
6. Click the uploaded file. In the following screen, click Preview Update Set.
Note: if you find any preview error, consult your administrator/ServiceNow expert to either accept or ignore the error.
7. Click Commit Update Set in the following screen.
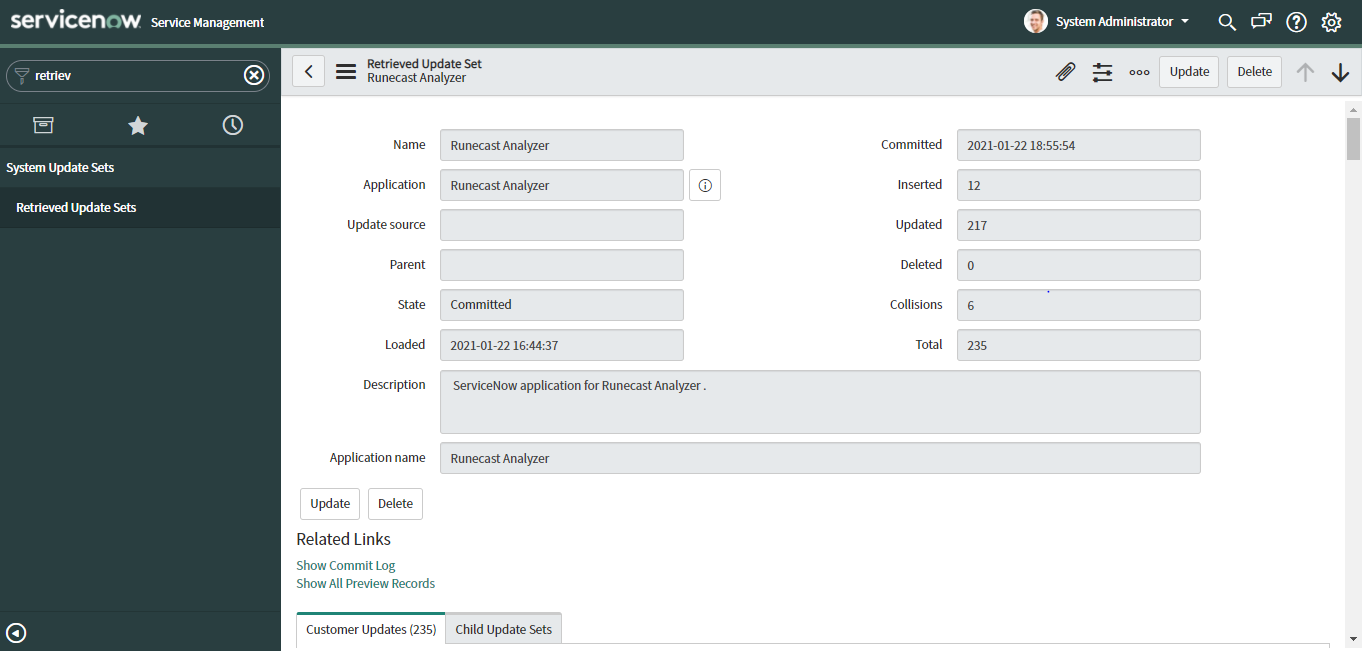
You have successfully imported the application.
Configure user permissions in ServiceNow
Required Roles
You need to assign the following roles to users who will use the application.
- itil and x_37790_runecast_a.app_admin to set the user as an admin user.
- itil and x_37790_runecast_a.app_user to set the user as an end-user.
These roles are available after the successful import of the XML application file in the previous step.
Assign User Roles
1. Open the required ServiceNow instance and login using the Admin credentials.
2. In the left panel Search box, type Users.
3. Click Users. Given below is a sample screen.

4. Select the required user to whom you want to assign the role and click the user name.

5. In the lower section of the screen, click the Roles tab.

6. Click Edit and assign the required roles. Following is a sample screen.
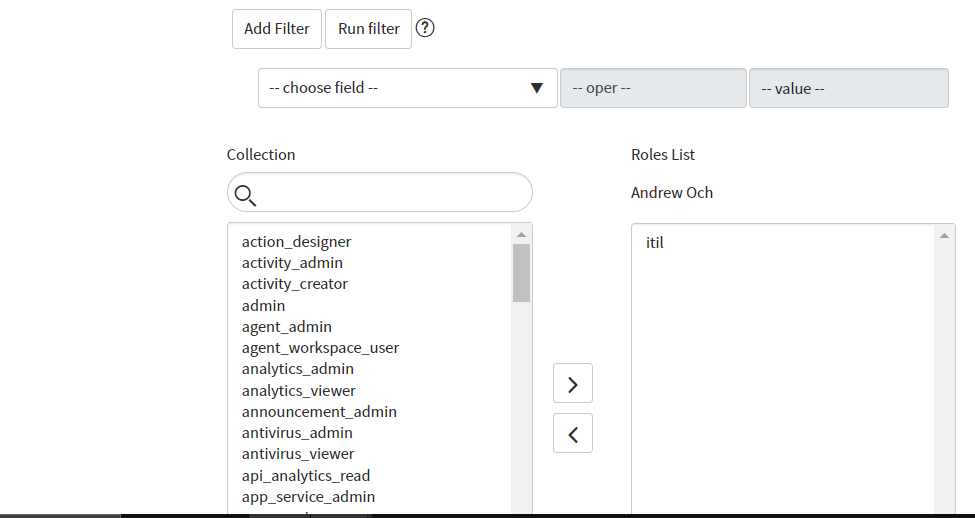
7. Select itil and x_37790_runecast_a.app_admin to set the user as an admin user.
8. Select itil and x_37790_runecast_a.app_user to set the user as an end-user.
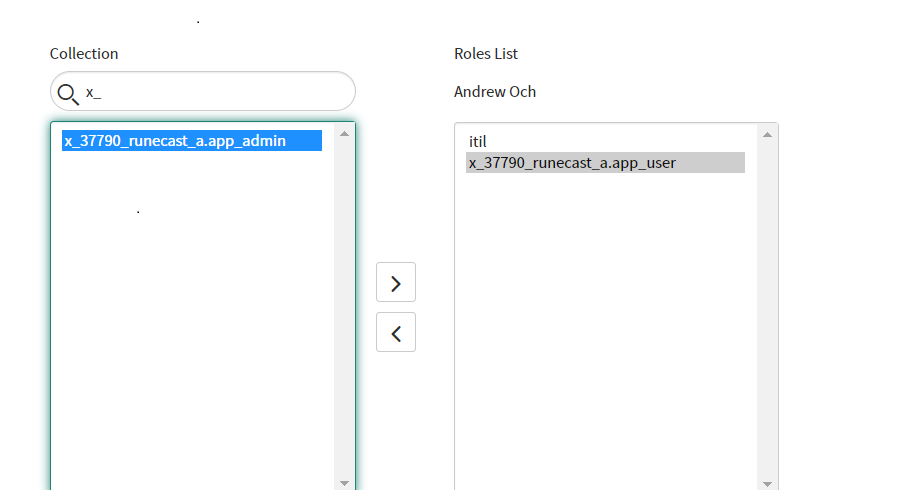
Note: Both application admin and application end-user need ‘itil’ role.
Configure the application
Type Runecast into the search box and open the settings submenu
1. Under Settings, click on the Configurations module on the left navigation panel. The following screen is displayed.

Click to view larger image ↑
From ServiceNow to connect to the Runecast Analyzer instance, the following settings are specified in the Configuration module:
URL of the Runecast Analyzer instance: Specify the URL or IP address of the Runecast Analyzer instance in the URL field’s specified format.
Note While the screenshot shows the specified port as 12345 unless you have customised your Runecast Analyzer instance this is available over the standard HTTPS port of 443 (and as such no port needs to be specified). Also, note that this will typically be a private LAN address and not an internet-accessible public IP address.
Runecast access token: The Runecast API access token authenticates access to the Runecast Analyzer API from the MID Server. The Token can be obtained easily from within the Runecast Analyzer at Settings -> API Access Token -> Generate API Access Token.
MID Server name: The MID Server is a Java server that facilitates communication and data movement between the ServiceNow platform and external applications, data sources and services. Enter the MID Server name in this field.
Runecast log verbosity: The logging levels from the most verbose to the least verbose available in ServiceNow are as follows:
- Debug
- Info
- Warning
- Error
The desired logging level is specified in the Runecast log verbosity field.
Log table cleanup duration: This field specifies how regularly deleting old log data specific to the Runecast Analyzer application occurs. To configure the logs for cleanup, enter the cleanup interval. This task cleans up any logs generated before the specified point from the ServiceNow instance.
- Select the field Log Table Cleanup Duration.
- Use the default cleanup interval shown, unless you have a reason to change it.
Coordinate this value with your internal requirements for storing log history. - Check on “Save”.
Adjust your Schedule
Data poll frequency from Runecast Analyzer is configured through the Scheduler module. This module helps to pull in all the logged issues directly from Runecast Analyzer.
- Under Settings, click on the Scheduler module in the left navigation panel. The following screen is displayed.
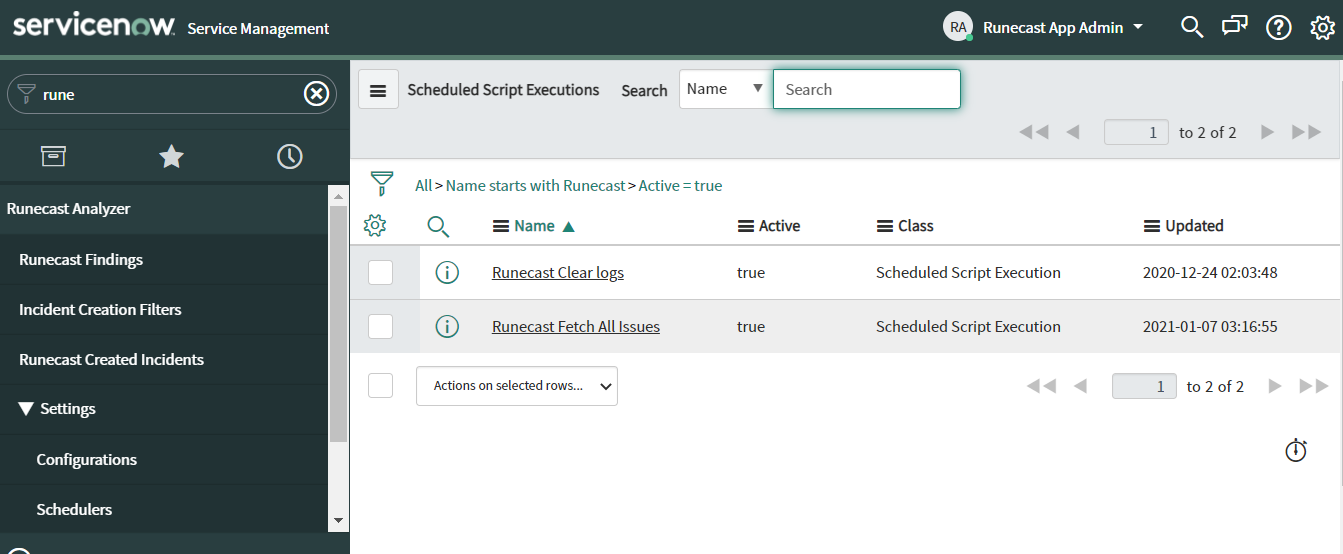
- Select the option “Runecast Fetch all issues.”
- In the settings, specify the Repeat interval at which the script to fetch the Runecast Analyzer issues is executed. By default, this is every six hours.
- You may click on “Execute Now” to trigger an immediate fetch of Runecast Analyzer issues.
Note: Manual execution of the Runecast Fetch all issues is not needed unless it is urgent. The system will auto-run the task based on the given schedule, and ensure regular updates of all related issues discovered by Runecast Analyzer within ServiceNow.
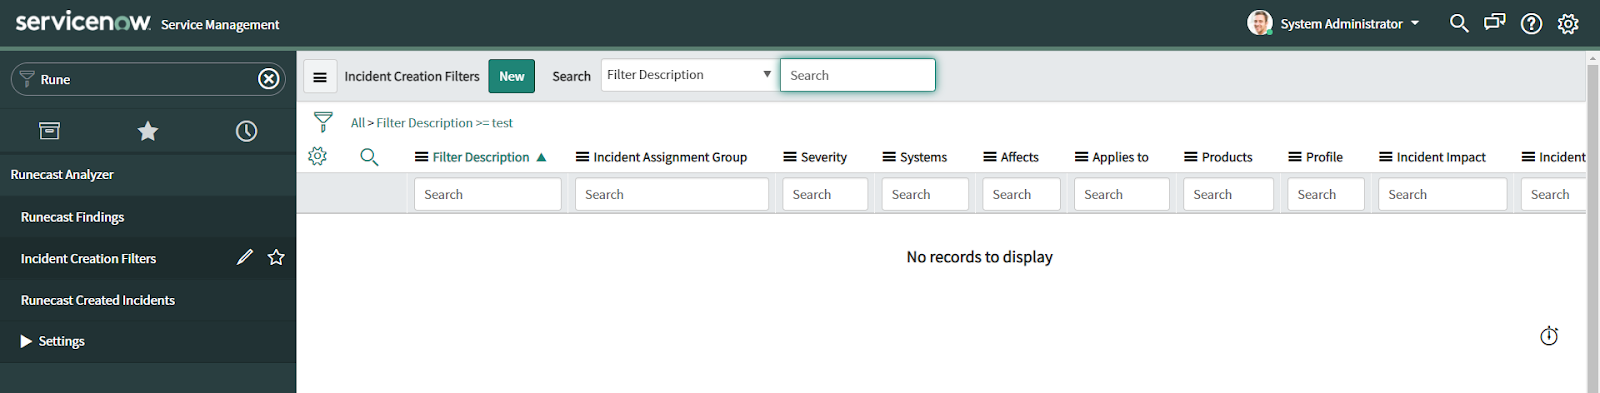
Setting up an Incident Creation Filter
To use the full power of the plugin, you should set up your first Incident Creation Filter.
- Type Runecast into the search box in the top left of the screen, and open the item Incident Creation Filter.
- Select the New button at the top.
- Describe your filter in the Filter Description field.
- Select the filter criteria for your Runecast findings in the section Filter parameters to create incidents. Any Runecast finding that matches a filter criteria will cause a ServiceNow ticket to be raised or updated. Note: If multiple filters apply, the first matching filter will apply.
- In the section Incident Settings, you can assign the desired Assignment Group in ServiceNow. ServiceNow will inform this group about any updates related to this ticket.
- You can also specify default settings for impact and urgency for any ticket created based on this filter in the same section.

Click to view larger image ↑
Press Submit.
Congratulations! You have successfully set up your first ticket automation in ServiceNow using Runecast findings.
Click to view larger image ↑
Click to view larger image ↑
Click to view larger image ↑